
How to Install Verity Mod
Get Verity Mod running on Minecraft Java — loader setup, AI backend (Groq/OpenRouter/Ollama), mods folder, first launch. Forge 1.20.1 or NeoForge 1.21.1.
This takes you from zero to Verity talking in your world. Verity is Java only — Forge 1.20.1 or NeoForge 1.21.1 — and it needs an AI backend running, which is the step everyone forgets.
Before you start
You need:
- Minecraft Java Edition — working and installed
- 4 GB of free RAM minimum (6 GB if you run other mods)
- Internet for downloading stuff
On Bedrock? Verity won’t work. See why →
Step 1 — Grab the right file
Head to the official project page and get the file matching your loader and version:
CurseForge — Verity JE Modrinth — Verity JE| Loader | Minecraft | Latest |
|---|---|---|
| Forge | 1.20.1 | 5.7.3 |
| NeoForge | 1.21.1 | 3.4.1 |
Which version to grab? Pick the one with the most downloads on CurseForge or Modrinth — highest download count usually means most tested and most stable. The “Latest” tag doesn’t always mean “best.” If you see multiple files for the same loader, go with the popular one.
Using the CurseForge app? You can skip the manual .jar wrangling entirely. Open the app, search for “Verity JE,” hit Install, and it handles the mod loader, the file placement, and the launcher profile for you. Same deal with Modrinth’s app if you prefer that ecosystem. Either way, you still need an AI backend — that’s not something the apps set up for you.
Fabric? Verity doesn’t support Fabric. Forge 1.20.1 or NeoForge 1.21.1 only. If your modpack is Fabric-based, you’d need to set up a separate Forge/NeoForge instance just for Verity.
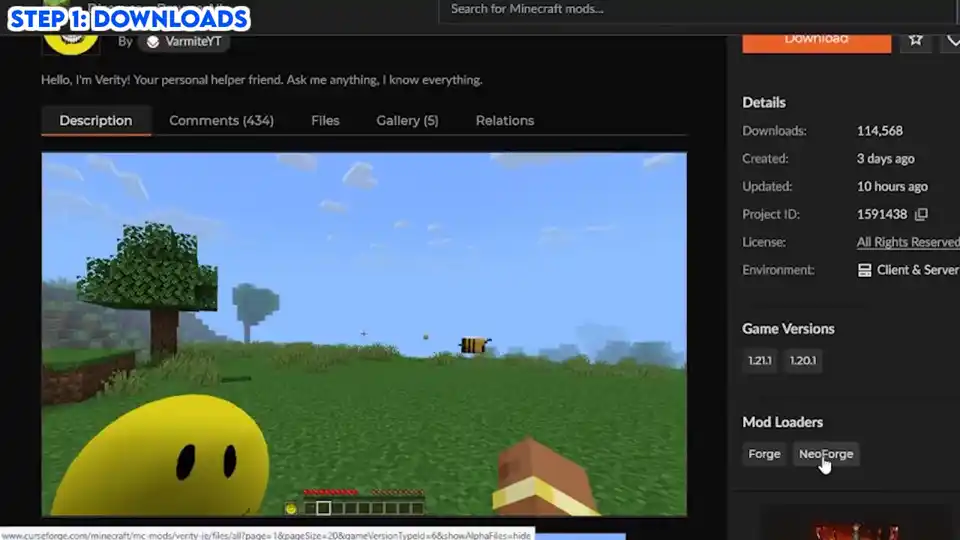
Don’t unzip the .jar. Don’t rename it. And don’t grab the GitHub source ZIP — that’s source code, not the playable mod.
Don’t know your loader? Launcher → Installations → look at your profile name. If it says “Forge” or “NeoForge,” you’re set. Just says “Latest Release”? You’re vanilla. Need to install a loader first — that’s Step 2.
Step 2 — Install the mod loader
Do this once. Pick the one matching your Minecraft version:
NeoForge (for 1.21.1)
- Hit neoforged.net and grab the Installer
.jarfor 1.21.1 - Double-click it
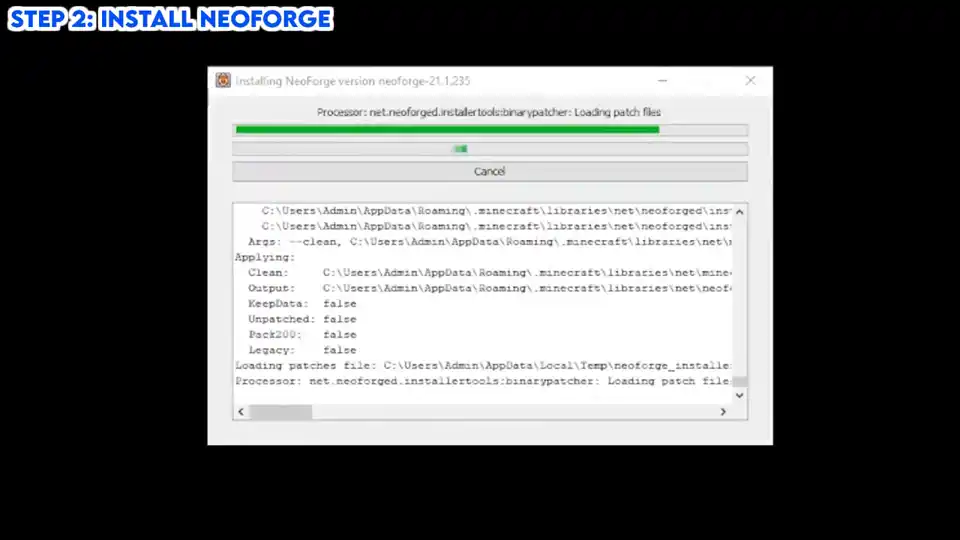
- Important: Check the installation path. If it points to
C:\Users\Admin\AppData\Roaming\.minecraftbut your Windows username is something else, change it to your actual username. NeoForge won’t find your game files otherwise. - Pick Install client → OK
- NeoForge profile shows up in your Launcher
Path screwup: The installer sometimes defaults to “Admin” instead of your real username. Check the path before installing. If you already installed with the wrong path, reinstall with the corrected path.
Forge (for 1.20.1)
- Hit files.minecraftforge.net and grab the Installer for 1.20.1 (recommended build)
- Run it
- Install client → OK
- Forge profile shows up
Common screwup: Installing the wrong version. Forge 1.20.1 only works with 1.20.1. NeoForge 1.21.1 only works with 1.21.1. Not interchangeable.
Step 3 — Make a launcher profile
- Minecraft Launcher → Installations tab
- New installation
- Name: something like
Verity - NeoForge 1.21.1 - Version: pick the Forge or NeoForge version you just installed
- Game directory: Create a new folder inside your
.minecraftfolder (e.g.,.minecraft/instances/verity). This keeps your Verity setup separate from vanilla. - Under More options, check Java Runtime is the bundled one for your version (Java 17 for 1.20.1, Java 21 for 1.21.1)
- RAM allocation: Change from 2GB to 4-6GB if your system can handle it. Verity with AI needs the headroom.
- Create
Step 4 — Configure AI Backend
This is the step most people skip. Verity’s AI needs a backend to run — without it, Verity shows up but won’t say a word.
You have three options. Pick one:
Option A: Groq (cloud, free tier)
Groq offers a free tier with fast responses. Here’s the setup:
- Go to console.groq.com and create an account (or sign in)
- Click API Keys in your dashboard
- Click Create API Key
- Name it something like “Verity”
- Copy the key (you won’t see it again)
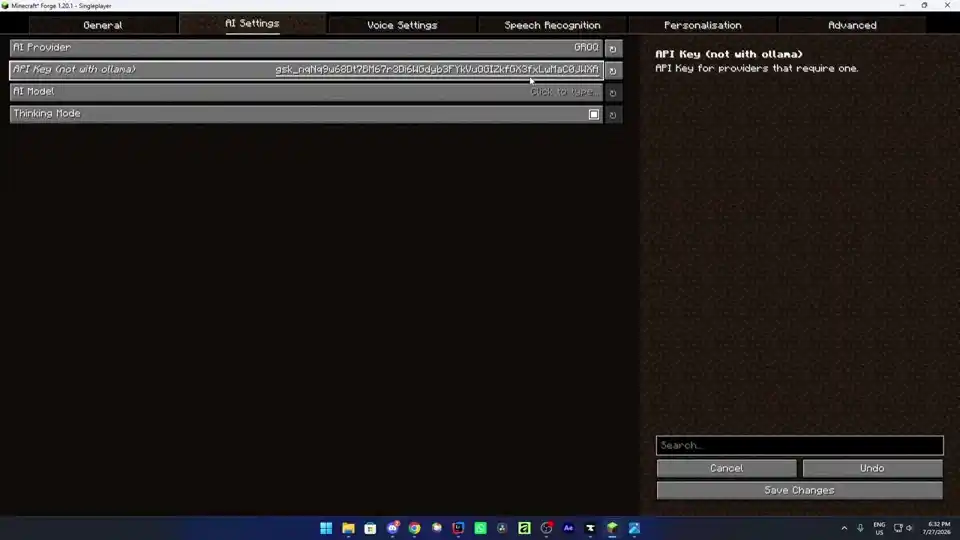
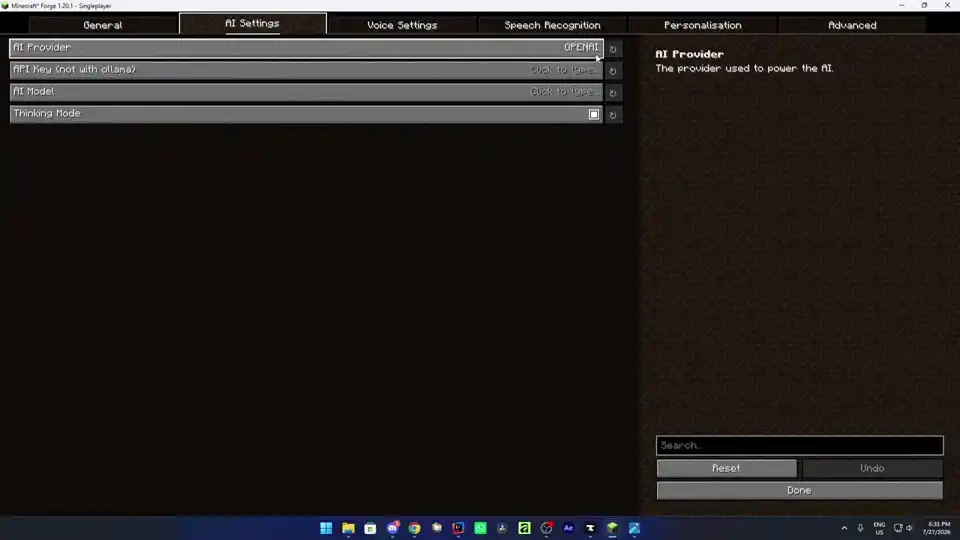
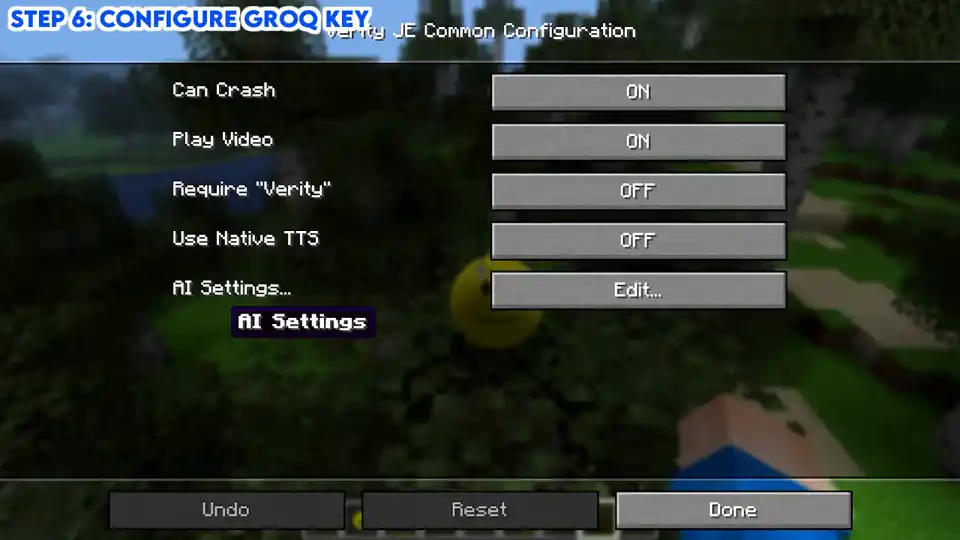
- Back in Minecraft: press Escape → Mods → find Verity → Config → AI Settings
- Paste your API key (Ctrl+V)
- Set AI provider to “Groq”
- AI model: You can choose from the models available. Varmite suggests picking one from Meta (Llama models). Some options:
- GPT 120B — smartest, but slower
- Llama 3.1 8B Instant — fastest
- Llama 3.3 Versatile — balanced
- Thinking mode: Turn it off for faster responses
Note: Varmite’s video says “Grok” — that’s xAI’s service. The official mod supports Groq (different company, same idea). Groq is what’s officially documented on the mod page. They’re easy to mix up.
Option B: OpenRouter (cloud, multi-model)
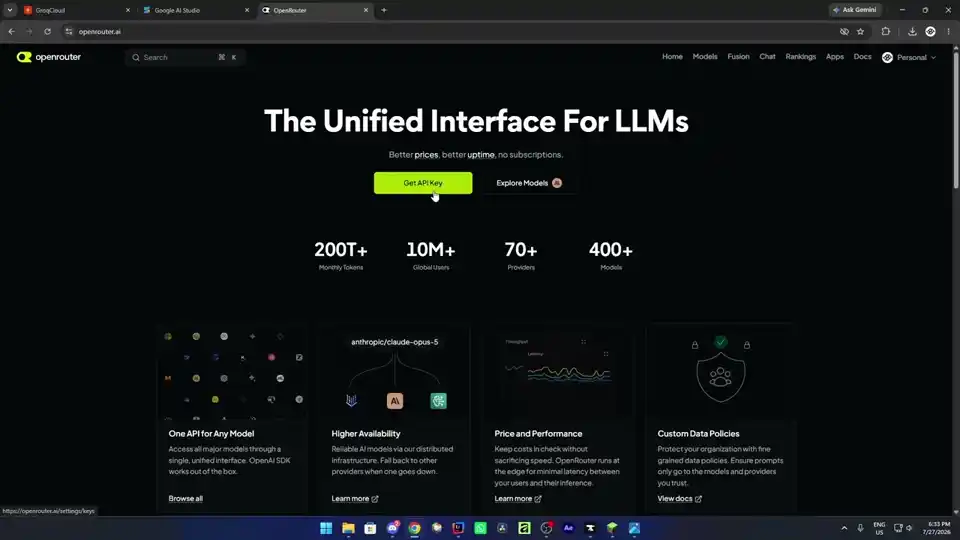
OpenRouter gives you access to multiple models through one API:
- Go to openrouter.ai
- Click Get API Key
- Create a new key, name it “Minecraft” or whatever you want
- Press Create, copy the key
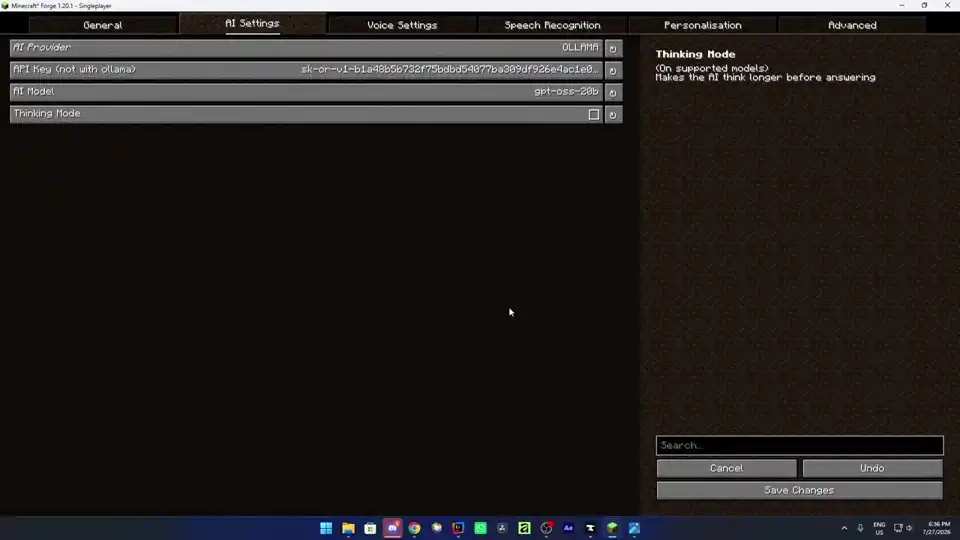
- In Minecraft: Escape → Mods → Verity → Config → AI Settings
- Paste your API key
- Set AI provider to “OpenRouter”
- You can search for free models by typing “free” in the model selector
Why OpenRouter? More model choices, and you can switch between them without changing providers. Some models are free, some cost a bit.
Option C: Ollama (local, private)
Ollama runs the AI on your own machine. Your conversations never leave your computer.
- Download Ollama for your OS
- Install it (it’s official, not a virus — Varmite confirms this in the video)
- Open a terminal and pull a model:
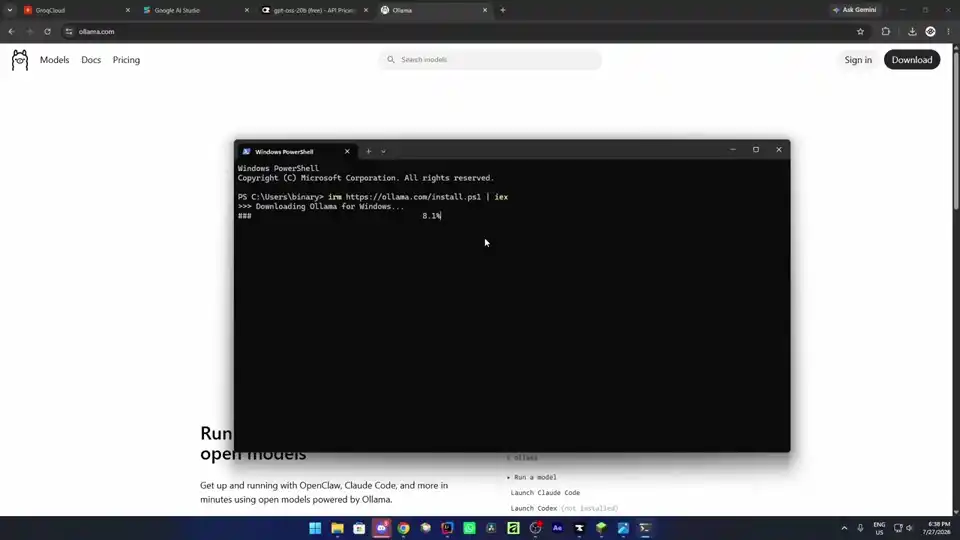
ollama pull <model-name>The exact model name is on the CurseForge or Modrinth page. Check there — the model changes between Verity versions sometimes.
Varmite’s advice: pick the smartest model your PC can handle. He recommends having a dedicated graphics card, especially RTX cards from Nvidia. GTX cards work too, but RTX is best.
- Leave Ollama running
- In Minecraft: Escape → Mods → Verity → Config → AI Settings
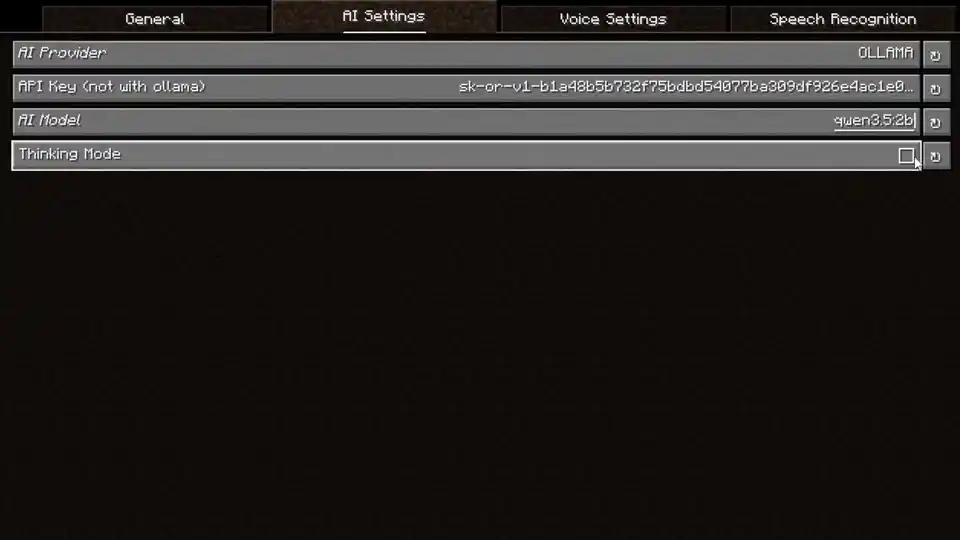
- Delete the default text in the AI model field
- Paste the model name you downloaded (e.g.,
llama3.1:8b) - Save changes
Full walkthrough: Ollama Setup Guide →
Skip this and Verity stays silent. Yellow sphere appears, but no talking. This is the #1 reason people think “Verity isn’t working.”
Step 5 — Drop in the mod and launch
- Find your
.minecraftfolder:- Windows:
%APPDATA%\.minecraft - macOS:
~/Library/Application Support/minecraft - Linux:
~/.minecraft
- Windows:
- Open (or create) the
modsfolder - Drop the Verity
.jarfrom Step 1 in there - GeckoLib required: Download GeckoLib for your loader version (NeoForge 1.21.1 or Forge 1.20.1) from CurseForge or Modrinth. Drop it in the mods folder too. Without GeckoLib, Verity and the monster form won’t animate properly.
- If the file page lists other dependencies, drop those
.jarfiles in too - Launch your Verity profile
- Main menu → Mods — you should see Verity listed (Forge 5.7.3 or NeoForge 3.4.1)
- Load a world — Verity shows up
Step 6 — Voice/TTS Settings (optional)
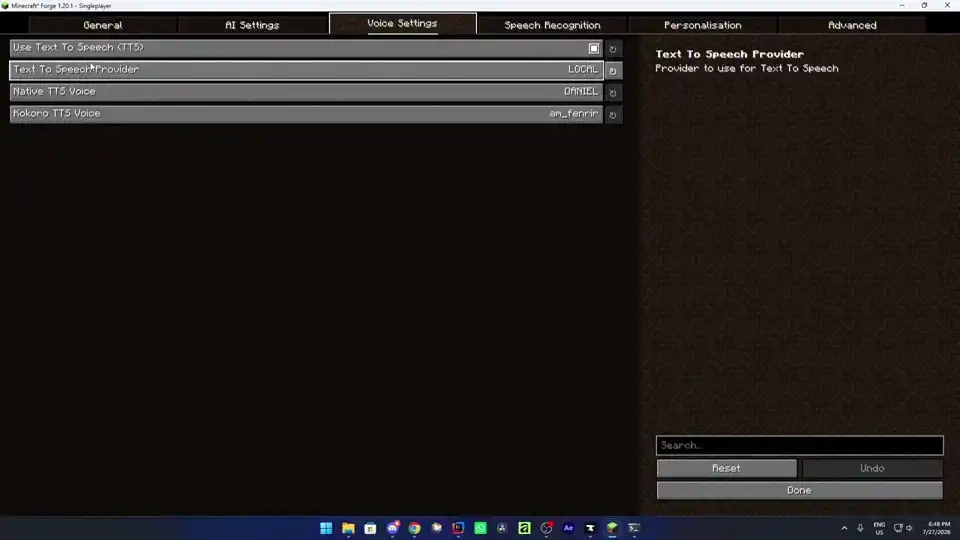
Want Verity to actually talk out loud instead of just text in chat?
- In Minecraft: Escape → Mods → Verity → Config
- Find Voice Settings
- Use TTS: Turn this on. “TTS” means text-to-speech — whenever Verity speaks, he uses this to generate a voice.
- Text-to-speech provider: Choose your TTS provider (the video shows options available in the config)
Full voice setup: Voice Setup Guide →
Note: Voice features are tested in English only. They may work with other languages but aren’t officially tested.
Check it’s working
Once in-game, you should see:
- Glowing yellow sphere following you around
- Verity responds when you talk (if your AI backend is running)
- Mods menu shows Verity with the right version number
Test the AI
Try these to confirm everything’s connected:
- Text chat: Type in chat and Verity should respond. Example: “Hey Verity, can you swim?” → It might say “I can help you with tasks, but I’m not exactly built for swimming.”
- Voice chat: Press V (push-to-talk) and ask a question. Verity should respond with voice (if TTS is enabled).
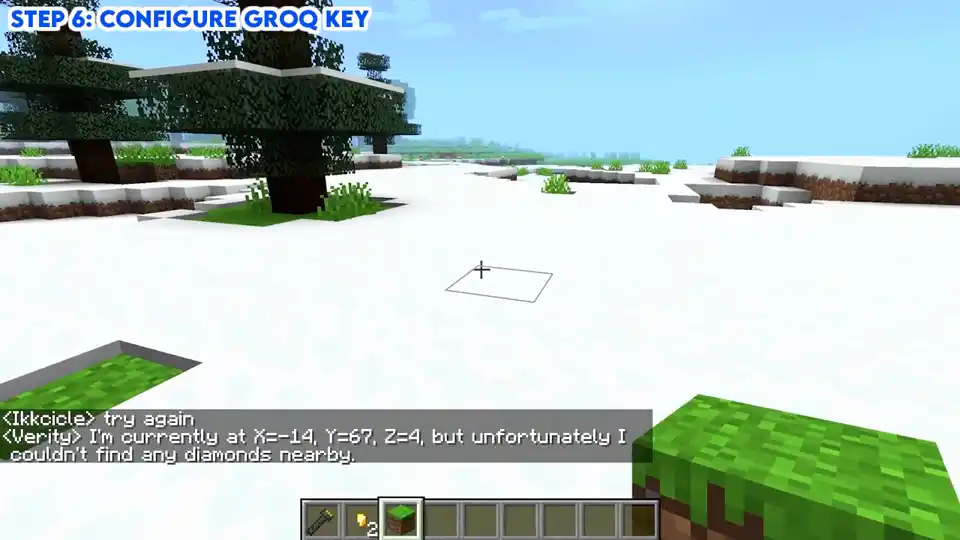
- Find items: Ask “Where are the nearest diamonds?” and Verity will try to locate them (may not always succeed, but it tries).
Not getting responses? Check that your AI backend is running. For Ollama, run
ollama listto see your model. For Groq/OpenRouter, check your API key is configured. See Troubleshooting →
Something off? Check Troubleshooting →
Stuff people get wrong
| Mistake | Fix |
|---|---|
| Grabbed GitHub source ZIP | That’s source code. Get the .jar from CurseForge or Modrinth. |
Renamed the .jar | Don’t. Some mods check their own filename. |
| Wrong Minecraft version | 1.20.1 build won’t run on 1.21.1. Match exactly. |
| Wrong loader | Forge and NeoForge aren’t interchangeable. Fabric isn’t supported either. |
| Forgot AI backend | Verity won’t talk without it. Start Ollama or configure Groq/OpenRouter first. |
| Wrong Java version | 1.20.1 needs Java 17. 1.21.1 needs Java 21. |
| No “Mods” button | You launched vanilla. Pick your Forge/NeoForge install. |
| Verity not in the list | Wrong mods folder, or missing dependency. |
| NeoForge path wrong | Installer defaults to “Admin” sometimes. Check the path points to your actual Windows username. |
| Forgot GeckoLib | Animations break. Download GeckoLib for your loader version and drop it in mods folder. |
| Voice input not working | Microphone not selected in Verity config. Push-to-talk is V by default. Check mic is picking up audio. |
| Game lagging with Verity | Increase RAM allocation from 2GB to 4-6GB in launcher profile settings. |
| AI responds slowly | Cloud (Groq/OpenRouter) depends on internet speed. Local (Ollama) depends on your hardware. Try a smaller model if on CPU. |
When things break
Verity doesn’t show up in the Mods list
- You launched the wrong profile (vanilla instead of Forge/NeoForge)
.jaris in the wrongmodsfolder- Missing dependency — check the file page
Verity shows up but won’t talk
- AI backend isn’t running — start Ollama or check Groq/OpenRouter API key
- Model isn’t pulled (Ollama) —
ollama listto check,ollama pull <model>if missing - Something blocking port 11434 (Ollama)
Game crashes on startup
- Minecraft version doesn’t match the mod version
- Wrong Java version
- Mod conflict — try removing others one by one
More at Troubleshooting →
One thing: Verity is an AI mod and might ask for mic or voice-chat access depending on how it’s set up. Don’t grant mic access just because some video showed it — check the project page first. Only allow what you’re comfortable with.
Setup guide based on the official Verity JE setup video by Varmite (linked on CurseForge), with additional tips from Ikkcicle’s community tutorial.
By Verity Mod Hub Team · Last updated: July 2026